6.S081的调试和VSCode环境配置
6.S081的调试和VSCode环境配置,还有一些踩坑和小技巧,杂七杂八的都放在这一篇里面了。(遇到什么情况就更新,准备一直更到做完Lab)
准备环境
Archlinux环境配置
我们可以用qemu模拟risc-v,就像模拟ARM一样。
直接参照这里来就好了。如果没有自带的包,可能会编译比较久。
https://pdos.csail.mit.edu/6.828/2020/tools.html
Archlinux可以用pacman装这四个包,都在comunity源里。
1 | sudo pacman -S riscv64-linux-gnu-binutils riscv64-linux-gnu-gcc riscv64-linux-gnu-gdb qemu-arch-extra |
然后测试一下:
1 | riscv64-linux-gnu-gcc --version |
测试一下编译运行xv6
1 | git clone git://github.com/mit-pdos/xv6-riscv.git |
结果发现不行,卡在这里不动了。搜了一下Archlinux就官网这一句话教程,也没别人遇到相同的问题(随手一搜arch的教程全是ubuntu的结果)。
1 | qemu-system-riscv64 -machine virt -bios none -kernel kernel/kernel -m 128M -smp 3 -nographic -drive file=fs.img,if=none,format=raw,id=x0 -device virtio-blk-device,drive=x0,bus=virtio-mmio-bus.0 |
依我用Archlinux的踩坑血泪史,八成是版本太高了。降级qemu-arch-extra 6.0.0一下试试,降级到跟官方页面上一致的版本5.1.0
1 | sudo downgrade qemu-arch-extra |
紧接着又报了这个错:
1 | qemu-system-riscv64 -machine virt -bios none -kernel kernel/kernel -m 128M -smp 3 -nographic -drive file=fs.img,if=none,format=raw,id=x0 -device virtio-blk-device,drive=x0,bus=virtio-mmio-bus.0 |
找不到io_uring的动态链接库,没关系,我们而再降级一下liburing或者自己下一个动态链接库趁系统不注意偷偷塞到/usr/lib之类的地方就好了。io_uring虽然很重要,但是查了依赖,我目前只有qemu直接依赖liburing(还有一个virtualbox的vde2是optionally requires),那就直接降级吧。
1 | sudo downgrade liburing |

然后一个sh就出现了,按Ctrl-a x退出。
到这里准备环境就好了,耗时10分钟。(用了降级系统包版本的脏办法,io_uring这么重要的东西自己乱换版本不太好,不过目前直接依赖系统liburing的包不多)
更新Ubuntu20.04配置
受不了坑位上7年前采购的老电脑的编译速度了,换教研室的20核服务器远程编译了。为了方便先将Ubuntu Server强行
1 | sudo apt-get install git build-essential gdb-multiarch qemu-system-misc gcc-riscv64-linux-gnu binutils-riscv64-linux-gnu |
Hello, World
写一个helloworld看看是不是真的好了。
在user目录里面直接新建一个hello.c
1 |
|
然后在Makefile里面修改,加上$U/_hello\
1 | UPROGS=\ |
然后编译运行:
1 | make qemu |
(注意不要用return 0,用exit(0)终止进程,或者你喜欢单片机的裸机的写法不要返回直接void main也行)
(Make sure main calls exit() in order to exit your program. )
1 | $ hello |

gdb+qemu调试
使用
现在6.S081推荐用gdb-multiarch这个包。
然后开两个终端(严格来讲应该叫终端模拟器,以下简称终端), 第一个
1 | make qemu-gdb |
第二个终端运行的你gdb(arch用riscv64-linux-gnu-gdb、ubuntu用gdb-multiarch或者其他的版本)
1 | riscv64-linux-gnu-gdb |
然后能看到输出下面这样应该就没问题了
1 | This GDB was configured as "x86_64-pc-linux-gnu". |
Archlinux上gdb-multiarch还有一段报错,guile的问题不过貌似没啥太大影响,riscv64-linux-gnu-gdb是好的
1 | Exception caught while booting Guile. |
在第一个终端你会看到:
1 | *** Now run 'gdb' in another window. |
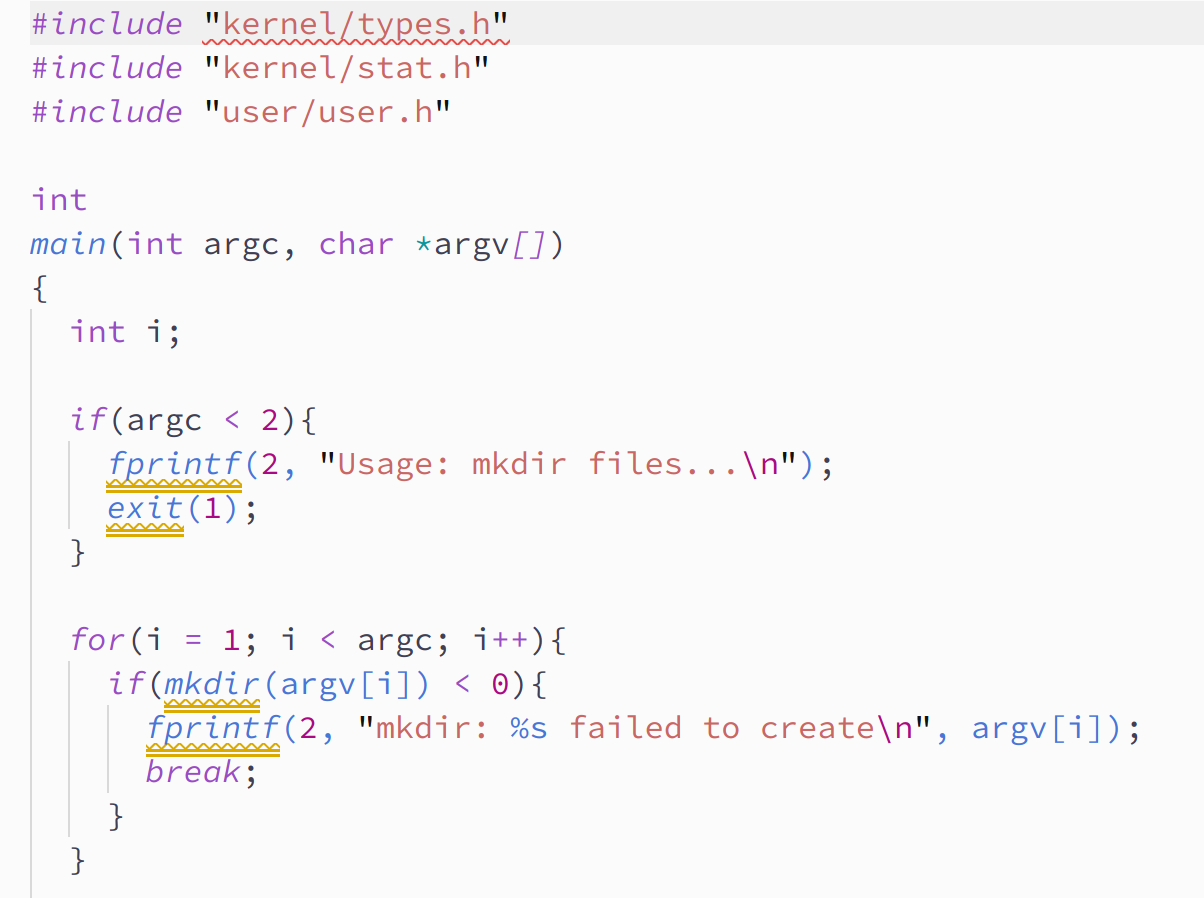
然后在另一个终端就可以调试了。gdb平时怎么用的现在就怎么用。这里以mkdir为例,给main函数打一个断点:
1 | (gdb) file user/_mkdir |
输入c, 停在了initing,没有进入xv6的sh,可能是系统初始化的时候调用了mkdir,我们看一下变量
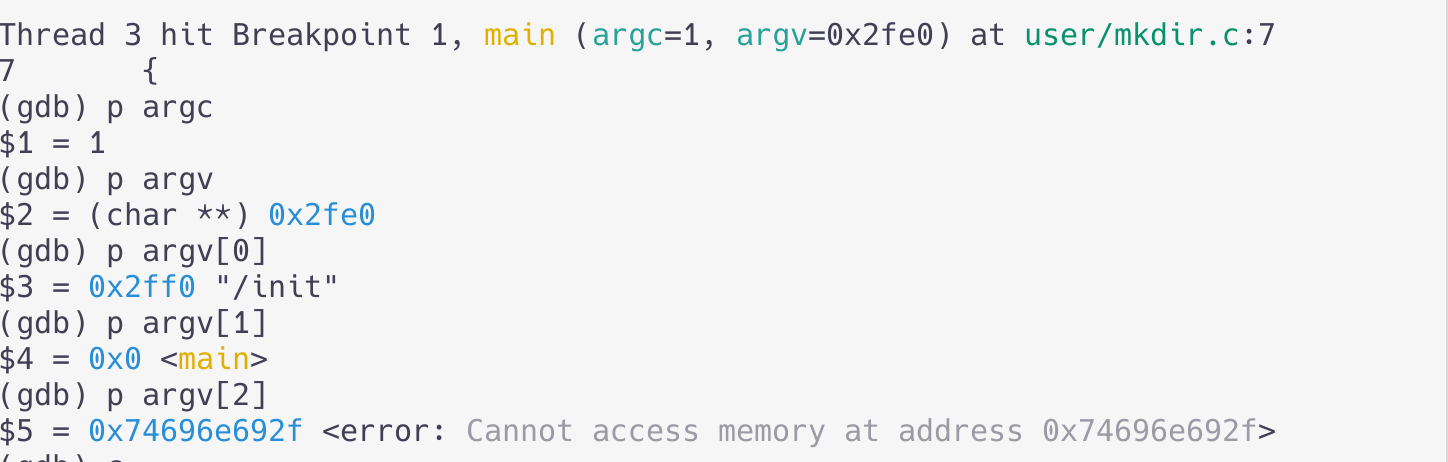
接着输入c往下走,在第一个终端(qemu)会进入xv6的sh,然后输入mkdir hello:
1 | (gdb) c |

可以看到执行过程中的变量了
其他信息
寄存器
查看寄存器info registers,会列出32个通用寄存器
1 | (gdb) info registers |
RISC-V的寄存器有32个,比ARM多,已经超过了我的记忆容量。有需要就去翻手册吧
调试时大多数情况只要关注a开头的几个就好了, s开头的是系统保留。a0和a1是函数参数和返回值(Function arguments/return values),a2到a7是变量(Function arguments), 你可以用汇编操作这些寄存器的值。
进程
info threads查看进程
VSCode配置
代码提示和自动补全
自动补全插件推荐clangd(比Microsoft官方的那个c/c++ extension好用)
默认的库函数提示会告诉你找不到kernel/kernel.h,需要手动添加
用clangd你需要一个compile_commands.json,我们可以安装bear,然后用bear生成compile_commands.json
1 | sudo pacman -S bear |
然后clangd插件就可以正常的跳转和识别头文件了
使用clangd-format进行xv6代码风格的格式化
有没有像Golang的go-fmt一样强制代码格式化的东西呢,有的,clang format。
安装clangd插件,在VSCode的设置里面启用format on save,然后在根目录下新建.clang-format文件。每次ctrl+s的时候就可以像go-fmt插件那样格式化代码了。
很遗憾的是,c/c++的代码风格并没有一个官方的统一风格,各种风格争论不休。
Linux的format风格我不太习惯,比如一个tab占8个空格。
下面是我改了改llvm风格的配置,跟6.828Lab的xv6风格不太一样,函数类型和函数一行,tab是4个空格(tab空两个看起来真的难受,早期显示屏小才这样子干,我觉得24寸以上显示器空四个才是合理的),括号换行和golang一样。(不然在go和c之间来回切换我要精神分裂了)
https://github.com/Archaeoraptor/dotfiles/blob/master/vscode/.clang-format
需要注意的是,一定不要对#include头文件自动排序,要设置SortIncludes: false不然头文件顺序不对会报错。
比如排序前:
1 |
自动格式化后
1 |
就会报错:
1 | ./kernel/stat.h:7:3: error: unknown type name ‘uint’ |
ps:如果你想要xv6Lab的风格,可以用Mozilla的风格改一改。
其他问题
gdb调试报错Cannot access memory at address
我在Archlinux下用riscv64-linux-gnu-gdb调试会报Cannot access memory at address 0x278
本来以为是跟以前在ARM上内核地址随机化一样的问题,关了随机化还是不行,最后发现要在.gdbinit.tmpl-riscv加一条set riscv use-compressed-breakpoints yes
链接
MIT 6.S081 xv6调试不完全指北
Using the GNU Debugger
https://github.com/wabscale/xv6-public
https://github.com/rizsotto/Bear